Working with all kind of file formats can be a struggle, I think a lot of photographers or people that are working with images agree on that. Saving all your images takes a lot of time. I started automated saving file’s, and I’ll show you in this blogpost how this can save you tons of time.
Saving a lot of time is of course always a good side effect of something. In the years I used to work as a photographer, I spent a lot of time making sure clients had the images in multiple file formats.
Since two years, I found a way to save the images easily in different file formats.
The base for saving images.
I prefer working with tiff images, not for my storage, but because you don’t lose quality when using them. In this blogpost, I tell you why I prefer to work with TIFF files instead of PSD files.
File Formats I mainly use.
As a Fashion, hair and product photographer, I use only a few different file formats. So have in mind that there is more out there than I mention in this blog post. The following file formats are the ones I use mostly:
Of course, WEB is not an official format, but for sure one I use the most in a batch way.
I tell you how I make sure that after every shoot I can deliver all the 3 file forms.
Important: Folder Structure.
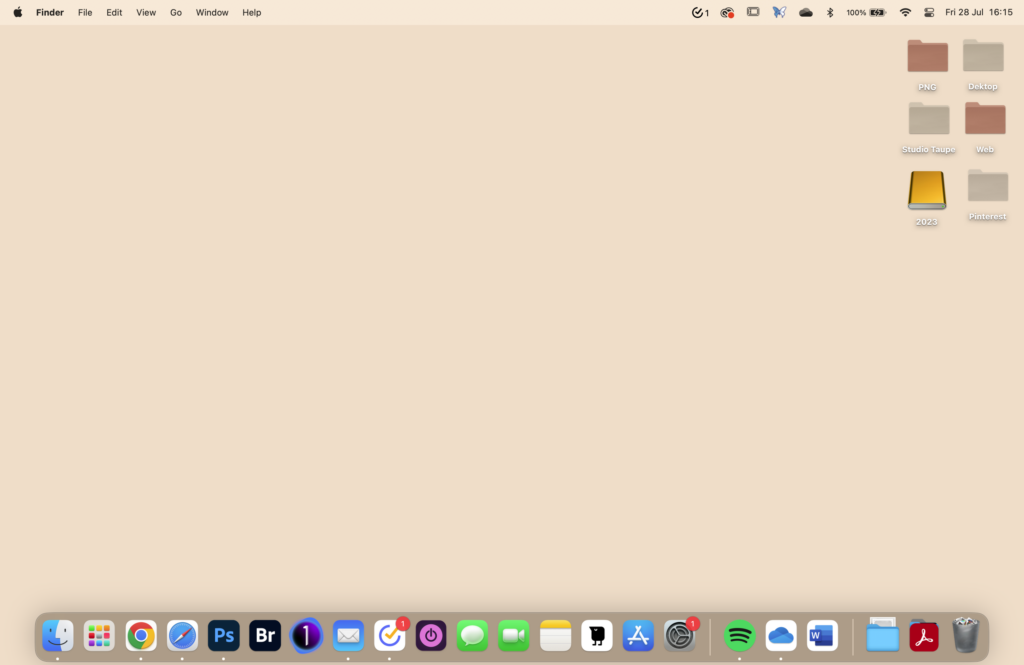
This technique is not gonna work if you always shuffle your folders around. My desktop is clear from files except for 3 folders; JPEG, PNG and WEB. To funk them a little up, I gave them my brand colours. But no matter what, these folders can’t be dragged around to other places on my computer.
Because we’re gonna work with batches who have a ritual they follow and when one of those is missing it’s not working properly. So make sure that you have folders with the right names on places where they are easily assessable and don’t bother you. But do it on a fixed drive. You don’t want to run the action while your hard drive or SSD isn’t connected. So I prefer a solid place.
Saving your work in different file formats.
The following headings are straightforward because Photoshop offers a straightforward method for saving your work in different formats through the “Save As” command. But just to make sure, you can refer to it while setting up your Actions (which I explain later)
The Steps for saving a JPEG
The Steps for Saving a PNG
The Steps for Saving a WEB Format.
Action as your base for saving files.
Now that you know how to save images for certain purposes, we can start making our lives easier.
During my retouching process, I make sure I have a folder with all the TIFF images I have from that shoot. To set up, your action, you only need one image for now.
Creating your Action.
In Photoshop, open one of the files, and create an “Action” by navigating to the “Window” menu, selecting “Actions,” and then clicking on the “Create New Action” icon at the bottom of the panel. Name your action (WEB, PNG Adobe RGB) and click “Record.”
Go through the “Save As” process for your desired format, making sure to choose the destination folder (The one that you created before on your desktop or other handy place) and any specific settings you require. Once done, stop recording the action.
You only need to do this for the WEB and PNG version, JPEG can be done through another method, but if you prefer to have all the same workaround, you can do it for JPEG too.
Time to batch!
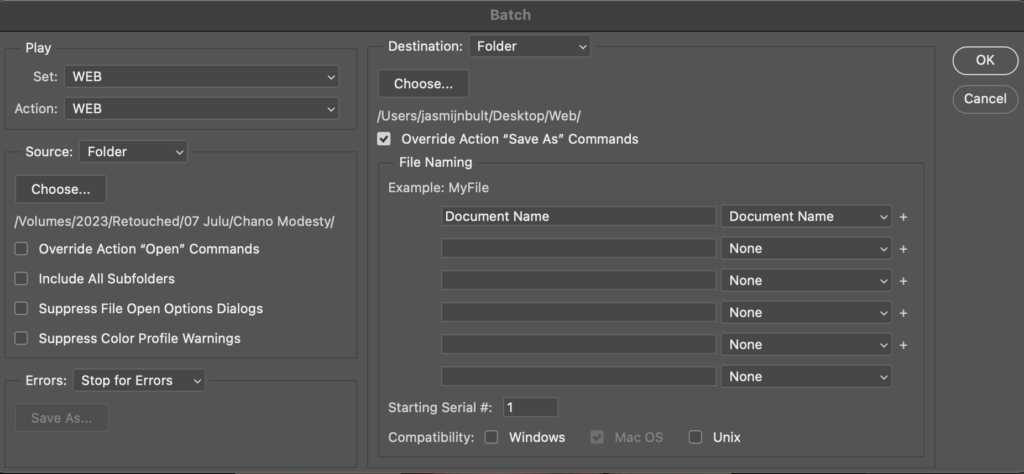
When you recorded all the actions that match your file saving/delivering system. It’s time to set them to use.
Go to “File” > “Automate” > “Batch.” Choose the action you just recorded, select the source folder with your files, and specify where you want the converted files to be saved (In your special folder!). Click “OK” to begin the batch processing.
Now it’s time to lean back and watch your images come by. No waiting more during your process after every image you have done. You just save the tiff files while working on them and process them in the end.
What about the JPEG’s?
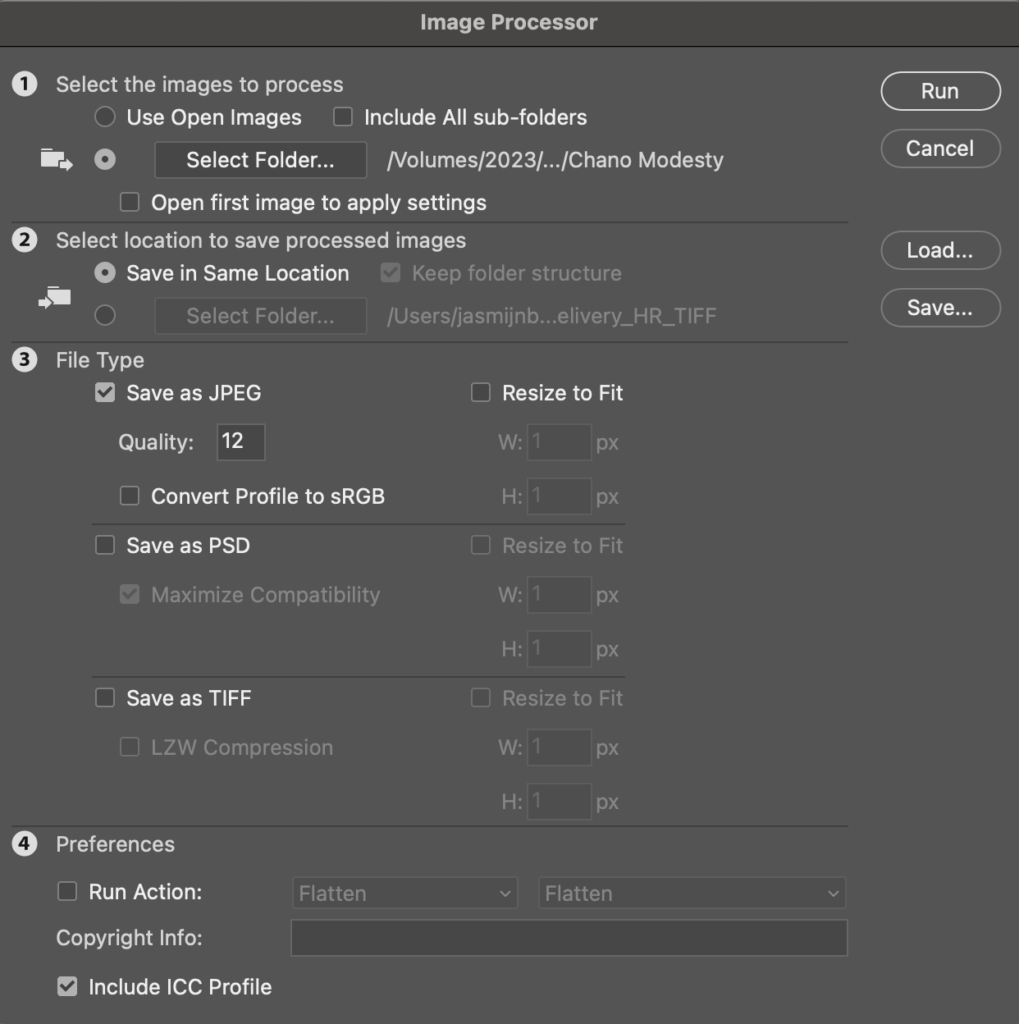
As I told before, JPEG’s don’t need a special action, because Photoshop already build in an option to export all your images to JPEG’s. Go to “File” > “Scripts” > “Image Processor” Select the folder that you want to be made JPEG. Make sure that File Type is set to “Save as JPEG” Quality 12 and click “Run”.
Sometimes I work with clients that need their retouched images back flattened. That is something that you also can do in the “Image Processor” and also need an Action. If you want to learn more about that, let me know in the comment section.
Time to save time.
By following these tips, you can efficiently save your Photoshop creations in different file formats, catering to various platforms and use cases. Mastering these techniques will undoubtedly enhance your workflow and allow you to share your work more effectively with the world and your clients.
Are you already following me on Instagram?