


Something I hear a lot of photographers struggle with, letting their clients choosing the images. Some days you may do it on set, but on other days you just prefer to do the shoot and head home. I wasn’t happy about sending contact sheets and searched for something different. And that was the moment when I found Picflow.
What is PicFlow?
In the basic Picflow is an online gallery. But not specialised in wedding or delivering final images.
A lot of online galleries are focused on delivering final imagery towards a client. While Picflow is focussing on the pre-production. The reason why I’ve chosen for Picflow is that you can upload your raw images there .NEF, .CR2, CR3, DNG and many more. This makes that you can select raw images.
How does it work?
After a shoot had been taken place, I try to upload the images. I need a fast internet connection, so most of the time I will do it right after I came home from the shoot. I upload all the raw images before even looking at them. And depending on the shoot it will take 15 minutes to upload them all. Then I work with a preset. This includes of which colours I want the header to be (the same as it’s here on the website) and that puts my watermark on top. So that the images can’t be used for sharing. Furthermore, I also write complimentary text with it. This makes that I’m sure that it’s only used for selecting purposes.
How to Select in Picflow.
There are quite some actions in Picflow that can be used to select the imagery. So in this blogpost I also will go into how to use each section of the selector and go in depth which every button does. Because when you’re used to working with it, someone else can experience the opposite and can be overwhelmed by it.
Right after sending the link.
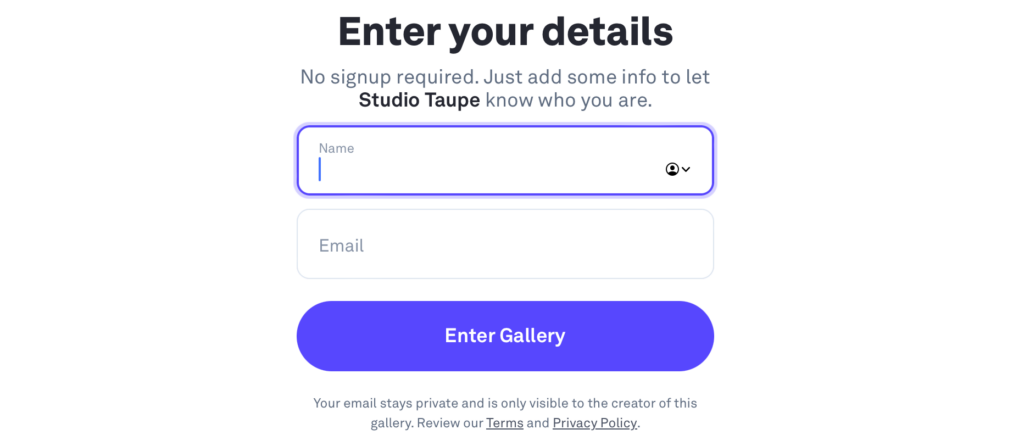
After I’ve sent the link, clients will continue to a login field. Every time that you open this link, it will re-ask for this information, this because I want to know who from the team is making the selections. If you re-enter the same name and e-mail address it will know that it’s you, and you will see the selections you made earlier, but also what colleagues did.
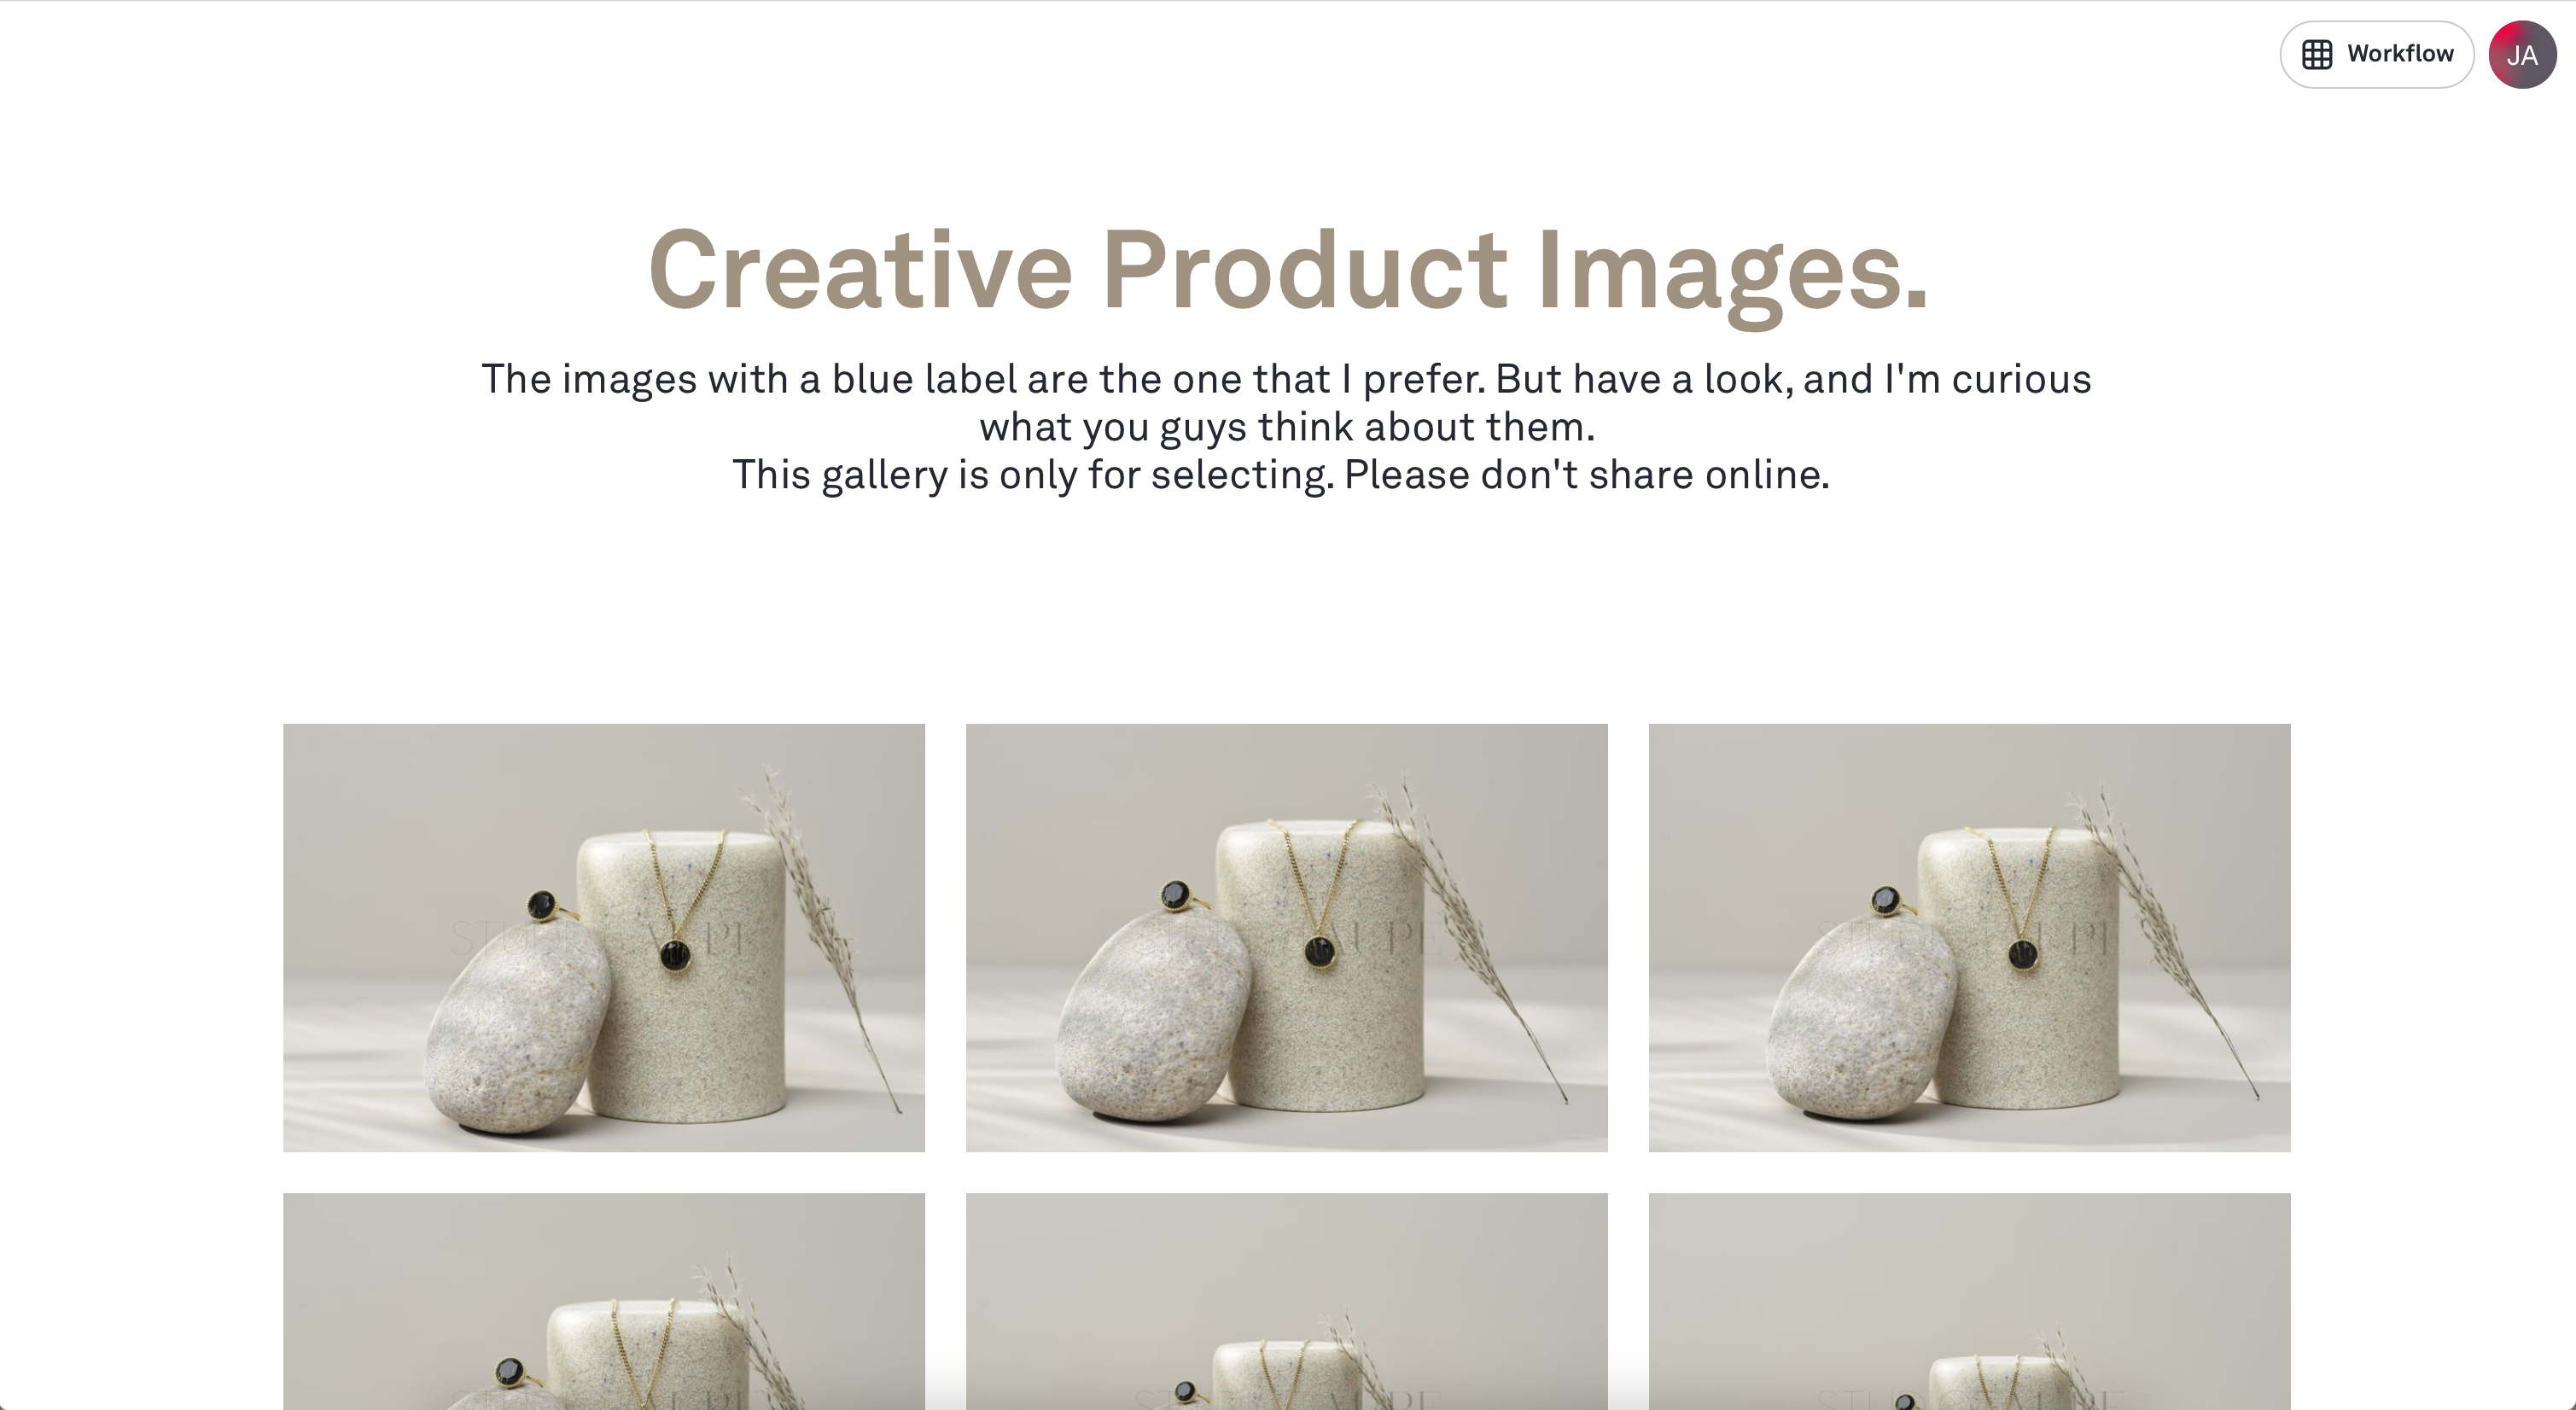
You’re in, now what?
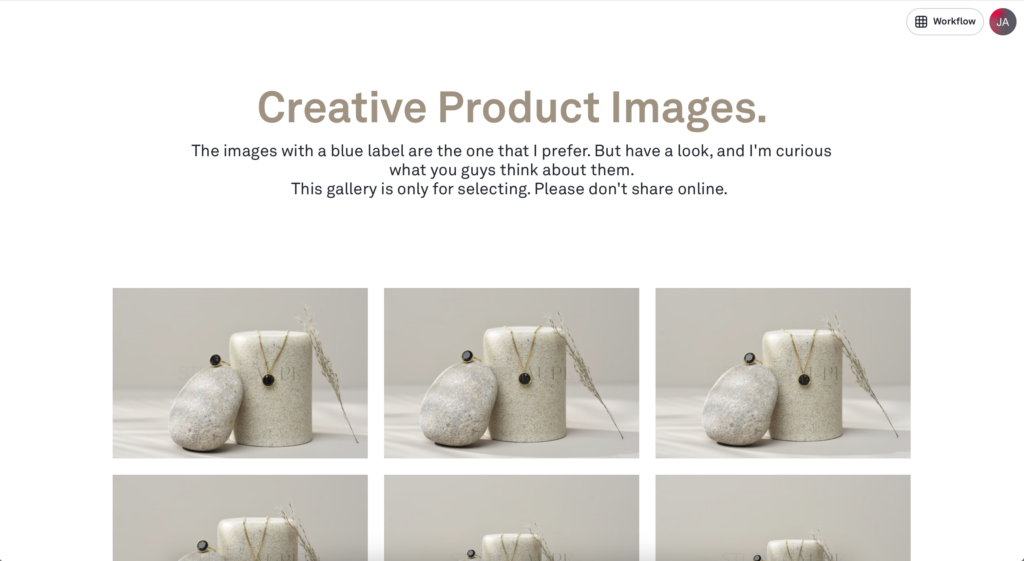
Right after you put your name and e-mail address, you will be greeted by the screen above. This is quite a nice view to go through, but if you take a close look you will see Workflow in the upper right corner. This is the part where you want to start selecting. This will take you to the advanced version of the application where you can put all different kind of labels, comments and so on.
Workflow mode.
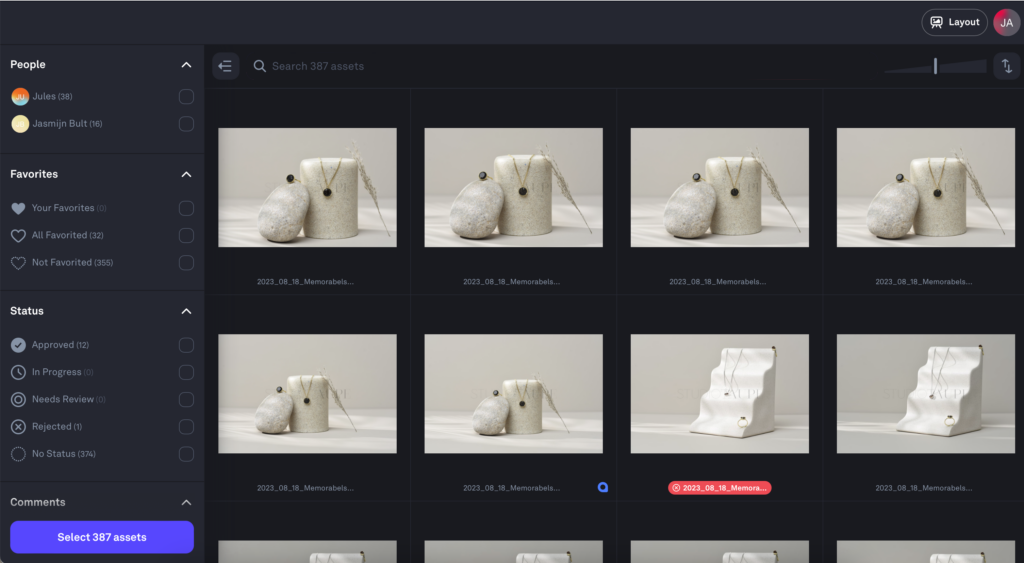
As you entered the workflow/advanced modus now the fun part starts. As you can see the layout changed quite a bit and there is a lot that we can choose from on the left-hand side. Further in this blogpost I will walk along the left side of the workflow section and what every aspect does.
What kind of selection options are there?
So Picflow has quite a variety of different selector options. Which I will take you along with.
They have a favourite section, where you can give the images that you like an easy heart so you can see which one were your favourite (or what multiple people had as a favourite). There is also a Status one, where you can approve the final images, when there in that part I know they are ready for retouching. Then there is a comment section, so I can find the specific images that you put a (retouching) comment on. Then there are labels, all kind of colours. Mostly I use the blue one to everyone know which images I prefer.
Favourites.
So this is a category that kind of speaks for itself. You can give the images a heart, and they will add to your favourites. But if you decide to do this with your team, you can also see which images have had multiple hearts. So you can discuss with colleagues, if we all gave them a heart we put those images in our final collection. So it’s easy to see which images everyone likes the most and you can select them to be retouched.
Status
This category has the following labels that can be used. Rejected, Needs Review, In progress and approved. This is the category that I prefer as final state. I prefer to say; You can use every tool and if you’re ready you can put them to the approved category. But sometimes it also will be used if someone isn’t sure about their selection. And want my opinion about the image. It can be put on Needs Review. And if I know that Needs Review and In Progress won’t be necessary it can be turned off to only approve or reject images.
As you’re reading this post as a photographer you can also set a limit on the approved section. This so clients can see which amount of imagery you approved on, on forehand.
Comments
Together with Annotations (which will come next) this is my favourite category.
As this makes communicating back and forth a lot less. You can put all the comments about the images on here. Think about notes as; Can you please make sure that there are fewer wrinkles on the pants? Or can you make sure that the text on the bottle is easier to read?
Annotations
So you see the comment above about the wrinkles? There can be annotated on the images. So you can draw a circle around the specific wrinkles that need to be removed. Or there can be shown things that are on the image but need to removed. So this makes it super easy to remove elements that you find annoying in the image.
Labels
Labels can be used for so many cases that I’m not even sure where to start.
As I said before, with product shoots, I mostly use the blue label to mark the image I selected before I moved on to the next set. It can be the last image, but something you changed the last things to look if they were prettier. When they were, that would be your last, but sometimes it is also the one before I changed everything up.
But the other labels are free of use and a lot of clients use these before they make their final selection, or sometimes it’s used to let me know that there are different batches of images. For example. Red can be used for High Priority images, while a green label indicates that they can wait a little longer. So I can see which is priority to do first.
And now, on to selecting!
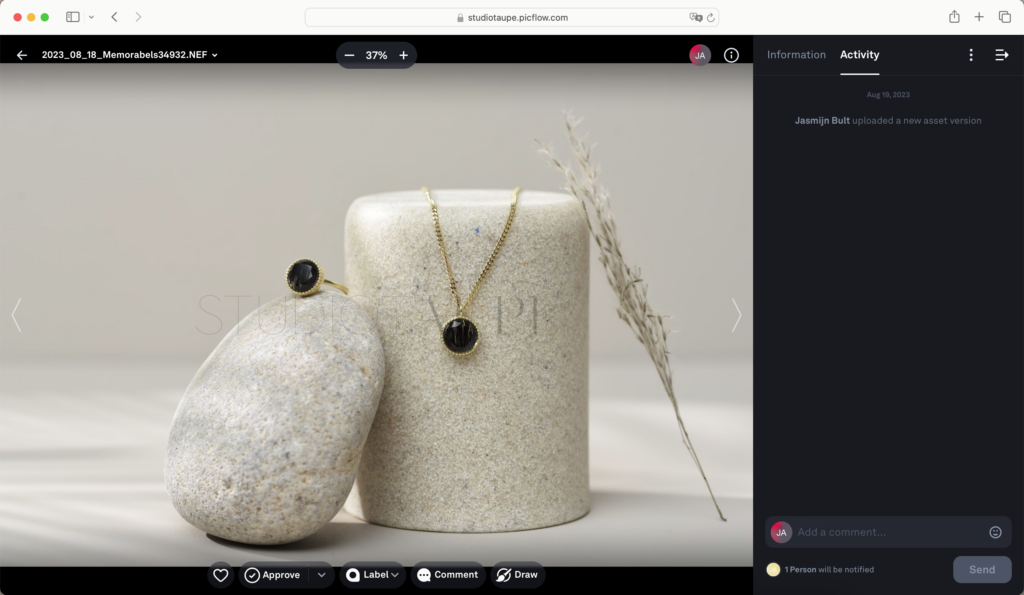
When you’re in the workflow, you can work with the small images that will be provided, but you can also double-click on them to open them bigger. If you hover over the image, the selection options will be shown, so you can see a heart, approve, label, comment and draw (annotation).
Now you can also continue to use your arrow keys to go through all the images and start selecting. In the upper corner, you can go back to the workflow menu and see what you have done. If you go to the left side, there is a menu where you can see al the images that you gave a label, or a heart. If the menu is not there then it’s collapsed, you can find a hamburger menu with an arrow which makes that the menu becomes visible again.
Ticking the boxes.
As I told you before, you can work with a team on Picflow, so there also can be different members that selected images. Sometimes you don’t want to know which the rest did, so there is also a people section in the menu. Here you can choose from which person you want to see what they did. Sometimes there worked multiple people on it, but you only need to know the selection from person x because he gives the final call on the images.
So you can be ticking boxes to see only the comments with the approved images. So you don’t see the comments at the images that you don’t need to retouch.
Why is it nice for me to use Picflow?
Because everything is in one place, It makes sure that there are no mistakes in reporting back with the image numbers. In Picflow I can export the approved images directly to capture one, which is my Raw editor of choice. And because I’m still human and AI doesn’t do all the retouching, I know that the things that are bothering you in the images are gone by checking at the end of the retouching session if everything is gone that you asked me to do.
Conclusion
So Picflow makes it super easy for me to send clients my raw files. Without really delivering my raw files. They have a watermark so they won’t be used. I turned off that the images can be downloaded. And it can be accessed on both mobile and desktop. I already explained a lot, but maybe a future one on mobile would be a bad thing either. So if you have any questions about using Picflow or things that I forgot to mention, don’t bother to put a comment in the comment section.
If you’re a photographer and want to use Picflow as well, don’t forget to use my affiliate link for a $10 discount.
*This blogpost is my own opinion and Picflow didn’t contact me or knows about this post. It’s just to showcase clients how to use it and make other photographer enthusiastic about the options out there.
10 Comments
Linda schrijft 't op
Wat een goede tips, ik maak graag natuurfoto’s daarbij vind ik een watermerk ook erg belangrijk
Renata Feyen
Being able to add a watermark is a great option. I sometimes wonder if I should apply this to my pictures too
Claire
I never heard of this before! But super interesting! Especially because I just bought a brand new camera.
Claire
I never heard of this before! But super interesting! Especially because I just bought a brand new camera.
Claire
I never heard of this before! But super interesting! Especially because I just bought a brand new camera.
Helen
Nice article..I love Photography
Sandra
heel interessant! Ik had hier nog niet van gehoord, dank je wel voor de tips!
Amelie van Writings by Amelie
Never thought about how to share photos with clients!
Wanda
Tot nu toe heb ik nog geen watermerk op mijn foto’s geplaatst, maar misschien zou ik dit wel eens moeten gaan overwegen.
Tess
Dit programma is zo te lezen ideaal om een contactsheet te delen met clienten. Ik had er nog nooit van gehoord